

Best Mold-Resistant Silicone Sealant for a Spotless, Mildew-Free Bathroom
2026-11-16
Few household frustrations rival the sight of black mold creeping along a freshly caulked bathtub. You scrub, you bleach, you replace the sealant, and somehow the spots return before the next deep clean. What most guides won't tell you is that the problem usually starts with the sealant itself. The right formula can make mildew feel unwelcome long before it ever takes hold. In this post, we're breaking down what actually makes a silicone sealant mold-resistant and why so many bathroom fixes fail prematurely. We're also looking at how Baolongda Group approaches the challenge differently, with formulations built for damp, high-humidity spaces where ordinary products fall short. If you're ready to stop fighting a losing battle against bathroom mold, this guide will show you where to start.
The Real Reason Some Mold-Resistant Tubes Still Disappoint
When a mold-resistant tube fails, it’s rarely because the biocide forgot to show up. More often, the old sealant wasn’t removed down to a clean, dry substrate, so a thin layer of soap film and dormant spores gets sealed in with the new bead. That trapped moisture gives mildew a head start underneath, where the additive never touches.
The cure window is another silent killer. A fresh bead can look fine after a few hours, but if it absorbs steam or splash water before it fully skins over, the protective chemistry gets diluted unevenly. You get a patchy barrier rather than a continuous one, and the first micro-crack near a wet corner lets mold thread right back through.
Then there’s the habit side. These tubes slow fungal growth; they don’t stop biofilm from forming when soap scum, oils, and dead skin settle into the joint. Without regular wiping and some airflow, the surface becomes a food source, and the mold-resistant additive simply can’t outlast that kind of neglect.
Reading a Label Without Falling for Bathroom Caulk Hype
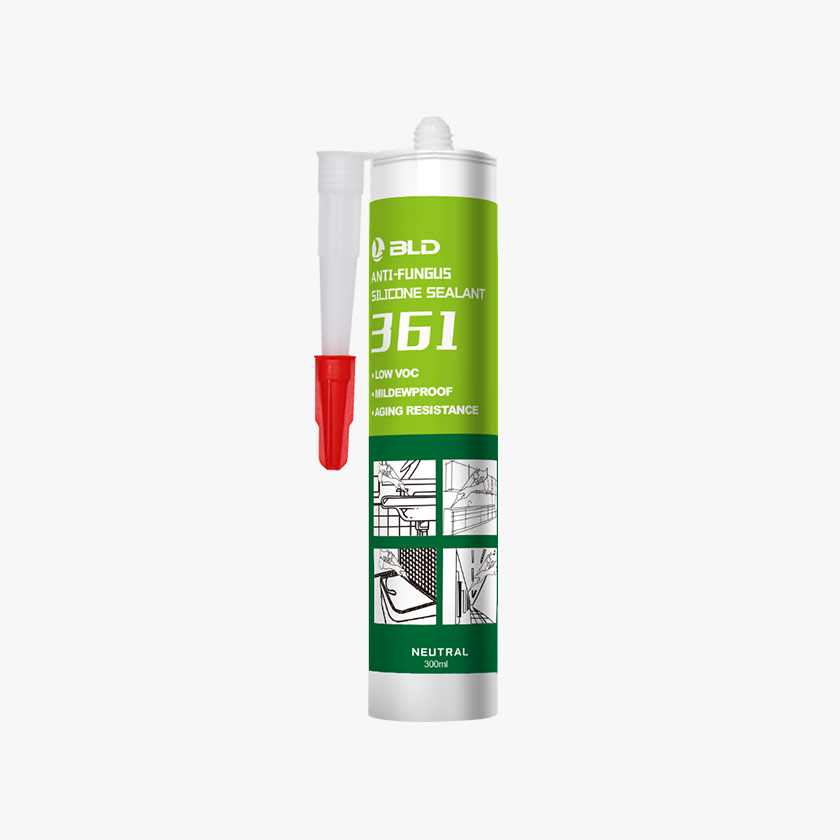
Most bathroom caulk labels lean hard on words like “mold-proof,” “permanent flexibility,” or “siliconized,” but those terms rarely mean what they suggest. A closer look at the fine print often reveals that a “siliconized” product is mostly latex with a small amount of silicone added for marketing appeal. If the joint will face standing water or frequent temperature swings, a label that says “100% silicone” is usually the more honest choice, even when it costs a few dollars more.
Pay attention to cure time and paintability instead of getting drawn in by bold promises. Fast-curing formulas can be handy, but they sometimes sacrifice long-term adhesion on damp surfaces. Paintable caulk is convenient for matching trim, yet in a shower or tub surround that very feature can signal a water-based product that may peel or discolor sooner than a dedicated kitchen-and-bath sealant.
The real test is what the label does not say. If it avoids stating the actual silicone content, uses vague phrases like “advanced polymer technology,” or buries the recommended applications in a wall of text, treat that as a warning. A useful label tells you plainly where the product should and should not be used, and it does not need to shout about being “ultimate” or “professional grade” to get the point across.
Dry, Clean, and Ready Before the First Bead
A flawless finish doesn't start with the brush or the spray gun—it starts with the surface itself. Wiping down the area with a degreaser or wax remover matters more than most people realize, because even a faint film of polish or finger oil can ruin how the first bead of water behaves. The goal is a panel that feels almost squeaky under a clean microfiber towel, with no hidden residue left behind.
Clay bar treatment comes next if the paint feels rough to the touch. Running your hand inside a plastic bag across the clear coat reveals contamination you'd never notice otherwise. Spend ten minutes here, and the protection you apply later will bond far more evenly. It's tedious, but this is the step that separates a finish that lasts weeks from one that lasts months.
Only after the surface is truly bare should you move on to taping off trim or applying your chosen sealant. Skipping the prep to save time always shows up later as uneven beading or patchy gloss. Treat the cleaning stage as the foundation—everything else simply builds on it.
Black Spots Almost Always Start in These Overlooked Joints
Dark patches rarely announce themselves on the cheeks or forehead first. They tend to settle in the places that bend and bear weight without drawing much attention: the outer knuckles, the crease of the elbow, the ridge just above the heel. In these spots, the skin is thicker and constantly working, so pigment builds up in a way that looks less like a stain and more like a permanent shadow.
What makes these joints so vulnerable is not a single cause but a slow combination of friction, pressure, and dryness. Resting your elbows on a desk, gripping a pen for hours, or wearing stiff socks creates repeated micro-abrasions. Over time, the skin responds by laying down extra keratin and melanin, which is why the area feels rough even after washing and why lightening creams alone rarely do much.
The fix starts with noticing the pattern instead of attacking it. A gritty scrub used too often will only signal more thickening. It helps more to soften the area with a mild exfoliant a couple of times a week, then apply a heavy moisturizer while the skin is still damp, and pay attention to how you sit, stand, and move through the day. If a certain chair arm, pair of shoes, or work habit keeps darkening the same spot, changing that contact point can do more than any quick treatment.
Laying a Bead That Water Can’t Slip Behind
Getting the bead right starts with a steady, unhurried pass. Keep the gun tip at a consistent angle and apply just enough pressure to push sealant into the joint instead of dragging it over the surface. Rushing leaves thin spots and pinholes, and those gaps are where water eventually works its way through.
Before the bead skins over, tool it with a wet finger or a rounded spatula. The point is not a perfectly smooth finish; it is pressing the material against both sides of the joint so it bonds cleanly and closes hidden channels. A slightly concave profile also flexes better than a heavy crown that can tear at the edges.
At corners, changes in plane, and terminations, overlap the bead a little rather than stopping short. That return of material keeps runoff from creeping around the end and getting behind the sealant. Where the joint is deep, set in backer rod first to give the bead a firm bottom and stop it from sagging into the void.
Staying Mildew-Free Without Bleach or Daily Scrubbing
The real trick is keeping surfaces dry long enough for moisture-loving spores to starve. A quick pass with a squeegee after the last shower does more than most people expect, but even without one, leaving the bathroom door and window open for ten minutes changes the microclimate. If your bathroom holds humidity, running the exhaust fan while showering and for a short while after is worth more than any cleaner.
For corners and grout lines where mildew still tries to settle, a spray bottle of distilled white vinegar works as a mild, non-bleach reset. Mist the areas after drying, let it sit for an hour, then wipe with a dry cloth. Hydrogen peroxide can handle the stubborn spots, but the goal is to make the surface inhospitable between uses rather than scrub it every day.
Fabrics and mats need the same attention. Hang towels so they can fully dry instead of folding them over a bar, and wash bath mats before they feel damp to the touch. Small habits like keeping the shower curtain spread out after a rinse and wiping down the window sill can keep the room from turning into a mildew-friendly pocket.
FAQ
Check the label for terms like mildew-resistant, mold-free protection, or made for kitchen and bath. These formulas contain antimicrobial additives that slow regrowth, but they still need proper ventilation and regular cleaning to perform well over time.
No. Strip the old caulk completely, clean the joint with a mildew remover or bleach solution, rinse, and let it dry. Fresh sealant will not stick well to old, damp, or moldy residue.
Remove every trace of the old sealant with a scraper, scrub the gap with a bleach-water mix, rinse it, and wipe with rubbing alcohol. The joint has to be bone dry before the new silicone goes in.
The shower and tub surround, the joint where tile meets the tub, around the toilet base, sink backsplashes, and any window edges in the bathroom. These areas stay wet or humid and are the first to develop mildew.
In a well-ventilated bathroom, a good 100% silicone sealant often lasts five to ten years. If you see staining, peeling, or mildew deep in the bead, it's time to remove and replace it.
For wet areas, yes. Pure silicone stays more flexible, holds up to constant moisture, and typically has better mold resistance. Silicone-latex blends are easier to tool and can be painted, but they don't last as long in a shower.
Sealing over moisture or old mold is the main one. If the joint isn't fully dry, or if any contaminated residue is left behind, mildew gets trapped inside the bead and spreads within weeks.
Tape gives cleaner, straighter lines, especially on textured tile. If you use your finger, keep a small cup of soapy water handy and apply light, even pressure, but make sure the surfaces are dry and you don't overwork the bead.
Conclusion
A tube labeled mold-resistant can still fail when the cure is too porous, the mildewcide sits only on the surface, or the bead was applied over trapped moisture. The real difference comes from reading the fine print for active fungicidal ingredients, movement capability, and long-term adhesion instead of trusting bold bathroom-caulk claims. Before any sealant touches the joint, the area has to be dry and free of soap film, old caulk, and loose grout; otherwise, even a top-tier silicone will peel or feed hidden growth from behind.
Black spots rarely begin in the middle of a long, smooth bead. They usually start in the overlooked joints: the tub-to-tile corner, the base of a shower screen track, the rim behind a pedestal sink, and the gap where the toilet meets the floor. Laying a continuous bead with steady pressure and tooling it firmly against both surfaces keeps water from slipping behind the sealant. After curing, the best defense is ordinary airflow, wiping down standing water after the last shower, and checking those hidden seams now and then. That habit keeps the bathroom clean without bleach-heavy routines or daily scrubbing.
Contact Us
Contact Person: Charles
Email: [email protected]
Tel/WhatsApp: +86-0536-3350888
Website: https://www.baolongda.com/